Sunday, 27 October 2013
Raw raspberry cheese cake with chocolate crust

Pumpkin seed power bars

160g almonds
80g cashews
100g pumpkin seeds
100g sunflower seeds
100g water
Pinch of salt
2tbsp raw honey
90g apricot jam (thermie made)
50g chia seeds
40g dried cranberries
50g sultanas
Preheat oven to 160C.
Place almonds and cashews in TM bowl and pulse once or twice on turbo to roughly chop. Set aside.
Place pumpkin and sunflower seeds in TM bowl and pulse on turbo once. set aside.
Place water, honey, salt and jam in bowl and heat on 100C for 6 mins speed 2 with MC off.
Place remaining ingredients in bowl including nuts and seeds. Mix on reverse, speed 4 for 10-20 sec until combined.
Press into mould or into baking tin lined with baking paper. Cook for 15-20 mins until slightly golden. Cool completely before storing.
I converted this recipe to the thermie from a recipe I came across from Lexie's kitchen:
Tuesday, 17 September 2013
Banana, Blueberry and Chia Muffins
.JPG)
Ingredients:
120g coconut oil
65g coconut sugar (could substitute other sugar)
2 eggs
3 ripe bananas
1 tsp vanilla essence
1 tsp bicarb soda
70g milk
200g SR flour
2 tbsp chia seeds
200g blueberries (I used frozen)
Method:
Preheat oven to 180C and line muffin tray with patty pans (makes 12).
Cream coconut oil, sugar and vanilla for 1 min/sp 4.
While blades running on sp 4, add eggs one at a time and combine for about 30 sec.
Add bananas and combine for 30 sec/sp 4.
Dissolve bicarb soda in milk and add milk and flour alternately while blades running on sp 4 over about 1 min.
Add the chia seeds and blueberries and mix for 20 sec/reverse/speed 3.
Place mixture in muffin trays and bake for 20-25 mins.
Allow to cool and ENJOY!!
Thursday, 5 September 2013
Thermomix milo (Gluten free)
.JPG)
If you haven't tried the thermomix milo, give it a go! It makes about 450g and lasts for ages stored in the fridge. It is also delicious sprinkled on top of ice cream or porridge!
.JPG)
I was feeling extra creative today and decided to create my own recipe for chocolate balls incorporating thermomix milo. The result was delicious, if I do say so myself!
Here is the recipe:
Place 120g of dates in bowl and chop for 20 sec on speed 9. Add in 180g of thermomix milo and 1 tsp on vanilla essence. Blend on speed 9 for a further 60 seconds. (Add in a tsp of water if the mixture is too dry). I then added in 1 tbsp of chia seeds (optional), and mixed for 5 seconds on speed 6. Roll into balls and store in the fridge. Makes approximately 20 balls. Let me know what you think!!
Menu plan # 3
Chicken & chickpea soup with pumpkin bread:

This pumpkin bread was so quick and easy to make and complemented the chicken and chickpea soup perfectly. (Everyone was hungry and I forgot to photograph the soup!)
Both recipes are from the recipe community:
Pumpkin bread: http://www.recipecommunity.com.au/recipes/pumpkin-bread/42450
Chicken and chickpea soup: http://www.recipecommunity.com.au/recipes/chicken-chick-pea-soup/17740
I omitted the cayenne pepper as my boys aren't too keen on spicy food yet.
Beef Stifado with steamed brown rice and broccoli:

Another great recipe community find. It makes a large amount with 800g of chuck steak in the recipe, and gives a tender "slow cooker style" result in only 60 minutes cooking time. If you have time you can cook the beef dish first, put on thermoserver and then steam the rice and broccoli at the same time.
http://www.recipecommunity.com.au/recipes/beef-stifado/52301
Julie Goodwin converted marinated chicken drumsticks with chips and salad:

I am a big fan of Julie Goodwin, and am excited that she has recently become a Thermomix ambassador. I use her marinade from her first cookbook "Our Family Table" all the time. It is even quicker to whip up a batch in the thermomix:
Chop 3 cloves of garlic, 60g of peeled ginger and 4-5 coriander roots for 5-10 seconds on speed 7. Scrape down the sides and add in 1/2 a cup of hoisin sause, 60g soy or tamari sauce, 60g rice wine vinegar and a drizzle of peanut oil (or I often substitute with sesame oil). Combine on speed 4 for about 10 seconds. Pour over chicken drumsticks (also great for chicken wings and pork spare ribs) and marinade in the fridge for at least 1 hour, or overnight.
Bake in the oven on 180C for about 40 mins.
Serve with home made chips and salad, with a dollop of thermomix made mayo, Enjoy!!
Pumpkin and cinnamon penne pasta bake:
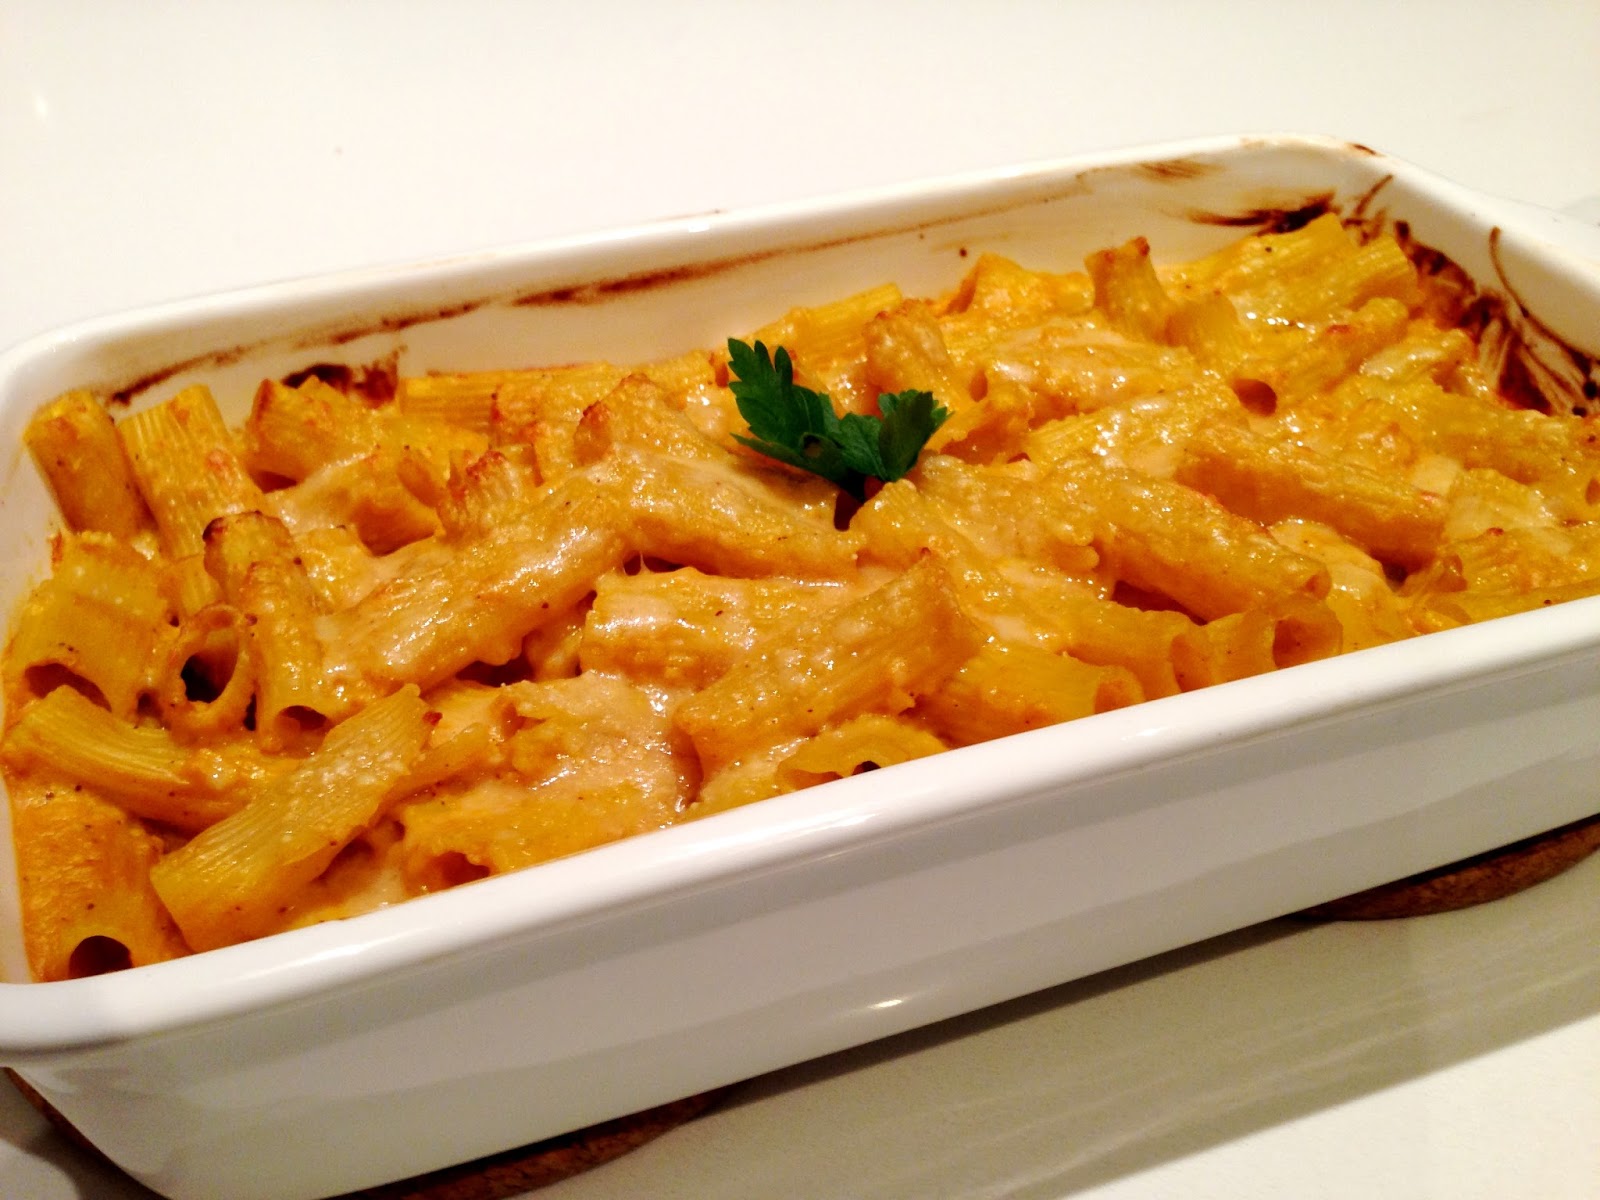
Another great recipe community recipe. I made this on a night when the kids were home at different times due to after school sport, so I decided to turn it into a pasta bake. It was a hit and I got official approval to add it to "The List" of approved dinners :)
Spinach pizza pockets:


This is a variation on the spinach and cheese pizza scrolls recipe which can be found on my previous blog post. The boys loved this meal and I felt good that they were at least eating some greens (and without protest). Win, win. I baked them on a pizza stone in the oven on 200C fan forced until they were golden brown.
Monday, 19 August 2013
Spinach and cheese pizza scrolls

These scrolls turn out an interesting greenish colour due to the spinach being incorporated into the flour. They freeze really well and are a very healthy lunch box food!
I got the original recipe from my Group Leader Elisabeth Higgins:
Ingredients:
60g baby spinach
560g bakers flour (I sometimes make them wholemeal by blitzing up about 100g of wheat grain/buck wheat or add in grains)
2 tsp salt
2 tsp/1 sachet yeast
20g oil
280g warm water
60g grated Parmesan cheese
100g grated Cheddar cheese
Method:
Place spinach in TM bowl and cover with bakers flour and blitz for 10-15 sec sec/sp 10.
If you need to grate your cheese do this after making green flour.
Place cubed Parmesan in TM bowl and grate for 10 sec/sp8. Set aside.
Place cubed cheddar in TM bowl and grate 4-8 sec/sp8. Set aside.
No need to wash out bowl, just continue recipe by adding spinach flour back into TM bowl.
Add remaining ingredients and combine on sp 6/ 7 sec.
Scrape down, set dial to closed lid position. Knead for 2 min on Interval setting.
Remove dough and rest until doubled in size (approx 30 min).
Roll out in a rectangular slab and sprinkle cheese (I also used tomato paste, and you could add any other toppings you would like at this stage), leaving a 2cm strip at the top.
Roll up and slice into scrolls.
Place in a cold oven and cook at 200C for 20-30 mins.
Muesli bars
.JPG)
These are the best muesli bars I have made in my thermie to date! Going to be a definite regular in my kids lunch boxes!
Here is the link:
I only had 70g of rolled oats left in my cupboard, used puffed rice (45g) and maple syrup instead of raw honey...
Nut butter
.JPG)
I love making my own nut butter. I follow the recipe in the EDC, but rarely use peanuts. With my latest batch I got really creative and toasted 1/2 and 1/2 mixture of cashews and almonds and blended with macadamia oil and a pinch of sea salt. Toast anyone?!
Thursday, 15 August 2013
Quick and healthy no cook slices

On the left is chia, date and walnut slice:
http://www.recipecommunity.com.au/recipes/chia-date-walnut-slice/76381
On the right is raw strawberry fudge:
http://www.recipecommunity.com.au/recipes/raw-strawberry-fudge-jules-galloway/87946
Give them a go! They are both delicious and my kids love them. Great for when a sugar craving hits!
Never split mayonnaise!
.JPG)
Perfect mayonnaise in about 4 minutes!
.JPG)
Whole egg mayonnaise in the thermie (5 ingredients)
.JPG)
List of ingredients on shop bough whole egg mayonnaise (12 ingredients)
When I first got my thermomix I had a couple of mayonnaise fails, until I was introduced to this quick and easy recipe by my lovely Group Leader Elisabeth Higgins:
Ingredients:
1-3 cloves of fresh garlic, peeled OPTIONAL (I use 1 clove)
1 whole egg (straight from fridge)
25g Dijon mustard
1/2 tsp salt
250g neutral tasting oil (not EVOO, I use grape seed oil)
1-2 tsp lemon juice, to taste
Method:
Chop garlic 5 sec/sp7.
Add whole egg, mustard and salt to bowl and mix for 1 min/37C/sp4.
Open lid and distribute any mustard sitting on blades or base of bowl.
Replace lid and put measuring jug on top. Set scales and weigh 250g of oil into measuring jug.
Remove measuring jug and put MC in place.
With blades running on sp 4 and MC in place, pour oil slowly in a steady stream onto the lid of the TM. Push TM down if it is trying to lift itself.
Once all the oil has run through and the noise of the blades running has changed your mayo is ready!
Do the taste test and add lemon juice with blades running again on sp 4.
ENJOY!!
Thursday, 8 August 2013
Menu plan #2
.JPG)
Mincing the meat

2 layers of sausages in the varoma

Served with pasta
Greek-Style Sausages in Tomato Sauce (Recipe from Devil of a Cookbook)
Sausage Ingredients:
800g beef cubed (I find about 3cm cubes and semi frozen given best texture)
1 onion, quartered
2 cloves garlic
2 tbsp fresh or 1 tbsp dried oregano
1 tbsp fresh or 1 tsp dried thyme
2 tbsp fresh or 1 tsp dried mint leaves
1 tsp ground cumin
70g bread crumbs
1 egg
2 tbsp olive oil
2 tsp sea salt to taste
1 tsp black pepper to taste
Method:
Place 1/2 of the beef into mixing bowl and mince 4 times/1 sec/closed lid/turbo. Repeat with remaining beef and set aside with first batch.
Place onion, garlic, herbs and cumin into mixing bowl and chop 2-3 sec/sp 7. Scrape down sides of the bowl.
Add all remaining sausage ingredients, including reserved mince and mix for 2-3 sec/closed lid/turbo.
Roll 2 tablespoons of mixture into a small sausage shape, repeating with the remaining mixture. Place sausages into the varoma bowl and tray and set aside until required.
Tomato Sauce Ingredients:
1 onion, quartered
2 cloves garlic
1 tbsp fresh oregano leaves
2 tbsp olive oil
120g red wine
2 x 400g tins chopped tomatoes
80g tomato paste
3 tsp Thermomix vegetable stock concentrate
1 tsp sugar
Sea salt to taste
Black pepper to taste
Few sprigs of thyme and oregano to garnish
Method:
Place onion, garlic and oregano into mixing bowl and chop 2-3 sec/sp 7. Scrape down sides of the bowl.
Add oil and saute 2 min/varoma/reverse/sp1.
Ass wine and cook for 2 min/varoma/reverse/sp 1.
Add all remaining sauce ingredients except garnish. Set varoma into position and cook for 20-25 min/varoma/reverse/sp 1.
Place sauce and sausages into Thermoserver, top with sprigs of thyme and oregano and stand for 5-10 mins before serving.
Serve with mashed potato or pasta, yum!!
Spinach Fettuccine with Vegetable Pasta Sauce
.JPG)
I used the pasta dough recipe from the EDC and blitzed a handful of uncooked baby spinach
with the flour before proceeding with the recipe.
.JPG)
Heaps of hidden veggies in this dish!
Vegetable Pasta Sauce (Recipe from Louise Fulton Keats Baby & Toddler Cookbook)
Ingredients:
1 brown onion, peeled and quartered
2 cloves garlic
1 tbsp olive oil
1 carrot, roughly chopped
150g pumpkin, roughly chopped (no need to peel if using butternut pumpkin)
2 zucchini, roughly chopped
100g button mushrooms
4 tomatoes quartered
1 tbsp tomato paste
400g tinned chopped tomatoes
1 tsp brown sugar
3 sprigs of fresh basil or oregano leaves
(Personally I feel this recipe needs a little salt added if for the whole family, so I added 2 tbsp of vegetable stock concentrate also)
Method:
Place onion and garlic into mixing bowl and chop 3 sec/sp 7. Scrape down sides of bowl.
Add oil and saute 2 min/100C/sp 2.
Add carrot, pumpkin, zucchini, mushrooms and tomatoes and chop 5 sec/sp7. Scrape down sides of bowl and repeat.
Add tomato paste, tinned tomatoes, sugar (and stock concentrate if using) and cook 15 min/100C/sp2 with MC removed and TM basket on lid to prevent splatter.
Add herbs, replace MC, and blend 1 min/sp 7, gradually increasing from speed 1 to speed 7.
This recipe makes about 1.5L and freezes well.
Chicken Enchiladas:


These were and absolute hit at my house! Next time I will add some vegetable stock concentrate to the enchilada sauce, I also added in a tin of red kidney beans, and only needed 1 avocado, not 2 as per the recipe.
I had time to make my own tortillas from scratch which is worth the extra effort if you have time. I got the recipe from the Robogourmet iPad app:
320g plain flour
1 tsp salt
3 tbsp olive oil
1 tsp baking powder
180g warm water
Put all ingredients in thermomix bowl and mix for 10 sec/sp 7 to combine.
Knead for 3 min/interval setting.
Remove dough and place in oiled bowl (or wrap in thermomat) and place in warm place to rest.
Divide dough into 10-12 pieces and roll out flat into rounds.
Fry in a lightly oiled frying pan until they start to brown.
Turn over and cook other side.
I made these as my enchilada sauce was cooking, and kept them warm in the thermoserver.
Pumpkin, Feta and Caramelised Onion Tart: (Recipe from Devil of a Cookbook)

This was the first time I have every made a tart (I've made plenty of quiches and pies, but never a tart!), and it was divine! It was delicious hot and cold, and would be a great one to take along for a picnic etc.
Ingredients:
500g pumpkin, cut into 4cm cubes
30g olive oil
1/2 tsp sea salt, plus extra to sprinkle on pumpkin
2 large onions sliced into rings
1 tbsp sugar
1 quantity short crust pastry (recipe in EDC)
100g Persian feta (I just used a smooth feta)
100g full-cream milk (I used hi-lo)
100g pouring cream min 30% fat (I used light pouring cream)
2 eggs
Method:
(I made my short crust pastry while my pumpkin was roasting, before caramelising the onions, and wrapped in my thermomat and put it into the fridge to cool before rolling out)
Pre-heat oven to 180C. Grease a 23cm pie tin and set aside.
Place pumpkin into a heavy based roasting pan, drizzle with 1/2 the oil and sprinkle with salt. Bake for 20-30 min, until soft and slightly coloured on the edges. Set aside.
Place onion, sugar and remaining oil into mixing bowl and saute for 30min/varoma/reverse/sp 2. Set aside.
Line prepared tin with pastry and blind bake until golden brown (approx 30 min). Spread reserved caramelised onion over cooked pastry shell, crumble over feta and top with reserved pumpkin.
Place milk, cream, eggs and remaining salt into mixing bowl and mix for 10 sec/sp 3.
Carefully pour over pumpkin base and bake for 40-50 minutes, or until just set.
We ate it served with steamed broccolini :)
Steamed Trevalla with Lime and Coconut Sauce: (Recipe from Devil of a Cookbook)

We had this on a Friday night as an at-home "date night" meal after the kids had gone to bed. It is a delicious example of using the Thermomix to it's full potential, and enjoying a restaurant quality meal in only 20 minutes!
Ingredients:
2 tsp sugar
4 kaffir lime leaves
1 red chilli (deseeded if preferred)
1 clove garlic
2cm piece of ginger, peeled
Flesh 2 limes
2 tsp fish sauce
600g skinless, boneless trevalla (or other white fish of choice), cut into serving portions
400g full-cream coconut milk (I used light and it was fine)
350g basmati rice
2 bunches bok choy, washed and drained
coriander leaves to garnish
Method:
Place sugar and lime leaved into mixing bowl and mill 10 sec/sp 9.
Add chilli, garlic, ginger, lime and fish sauce and chop 10 sec/sp 9.
Add coconut milk to mixing bowl and heat for 4 min/100C/sp1. Pour sauce into thermoserver to keep warm.
Without washing bowl, place 1L water into mixing bowl. Place rice into basket, rinse and insert. Place fish into varoma dish and bok choy onto varoma tray. Set varoma into position and steam for 13-16min/varoma/sp 4.
Serve rice topped with fish and bok choy. Pour over reserved lime and coconut sauce and garnish with coriander.
Enjoy with a glass of wine!
Wednesday, 31 July 2013
Gluten free chocolate zucchini cupcakes

I make these quite often and they are super healthy as well as super yummy. They also freeze well for lunch boxes, if you can sneak a batch into the freezer before they get eaten that is!
Here is the link: http://www.recipecommunity.com.au/recipes/chocolate-zucchini-cake/87668
Tuesday, 30 July 2013
My first ever sponge cake attempt!

So the other day I decided that aged 36, it was high time I attempted to make my first sponge cake. Thanks to "Trixie's lighter than air sponge cake" recipe in The Devil of a Cookbook and channeling my inner Nana it was a great success! I spread my strawberry vanilla jam between the layers, yum!
Baking with the thermie is made so easy with the inbuilt scales that can be re-tared as each ingredient is added, and the mixing time is so quick and efficient.
BBQ sauce

OK so I'm a little obsessed with making condiments in my thermie! This is my latest batch of the "Quirky Cooking" BBQ sauce. It is especially delicious on a homemade "meatlover's" pizza!
Here is the link:
http://quirkycooking.blogspot.com.au/2010/09/this-is-my-barbeque-sauce-recipe-which.html
Strawberry vanilla jam

This jam is delicious and sets perfectly every time with just the pectin from the skin of the green apple. Best of all it only takes 30 minutes to make, no stirring required!
Here is the link: http://tenina.com/2011/08/strawberry-vanilla-jam/
CADA, try it!

CADA stands for coconut, apple, dates and almonds and is a quick and delicious fresh muesli to have for breakfast (or I have it for lunch quite often as well!) The recipe is in the new EDC, but is basically 1 apple quartered, 40g almonds, 40g dates and 40g fresh or dessicated coconut. Pulse on turbo 3-4 times, serve with a dollop of natural yoghurt and you're done!
Saturday, 27 July 2013
Menu plan #1
Impossible Quiche & Raw Beetroot Salad

You can make 1 large quiche or mini quiches using a muffin tray

The "Impossible Quiche" from the Devil of Cookbook is a favourite in my house. I sometimes double to recipe and make one for a friend as well. So quick, easy and delicious!
Ingredients:
50g Parmesan, cubed
150g Cheddar, cubed
1 small onion, halved (I sometimes use red onion or spring onions)
120g ham, roughly chopped (I often use chorizo, yum!)
50g plain flour
4 eggs
370g milk
Method:
Pre-heat oven to 180C and grease a 25cm pie tin (or 2 x 6 muffin trays) and set aside.
Place Parmesan and cheddar in mixing bowl and grate 10 sec/speed 9. Set aside
Place onion and ham (or chorizo) into mixing bowl and chop 5 sec/sp4.
Add reserved cheeses and flour and blend for 5 sec/sp4. Distribute evenly over base of tin/muffin trays.
Without washing mixing bowl, place in eggs and milk and mix for 3 sec/sp3.
Pour over base and cook for 40 minutes (about 20-30 for mini quiches) or until puffed and golden.
Cool slightly before slicing.
I served it with the Raw Beetroot salad from the Everyday Cookbook.
The mini quiches are also good for lunch boxes!
Aussie Meat Pies

The Aussie meat pie recipe has been another fave for us for a long time. The recipe can be found in both the Meat on the Menu cookbook and the new Everyday Cookbook. My kids love an individual pie in a ramekin with their initial on it. I served it with sweet potato chips (cut into chip sized pieces, coat in olive oil and sea salt and roast in the oven while cooking the pies) and salad. I must confess I was in a rush that night, so used frozen puff pastry, but I'm eager to try out the iced puff pastry recipe next time.
My version of Eggs in Ramekins
.JPG)
Assembling the varoma
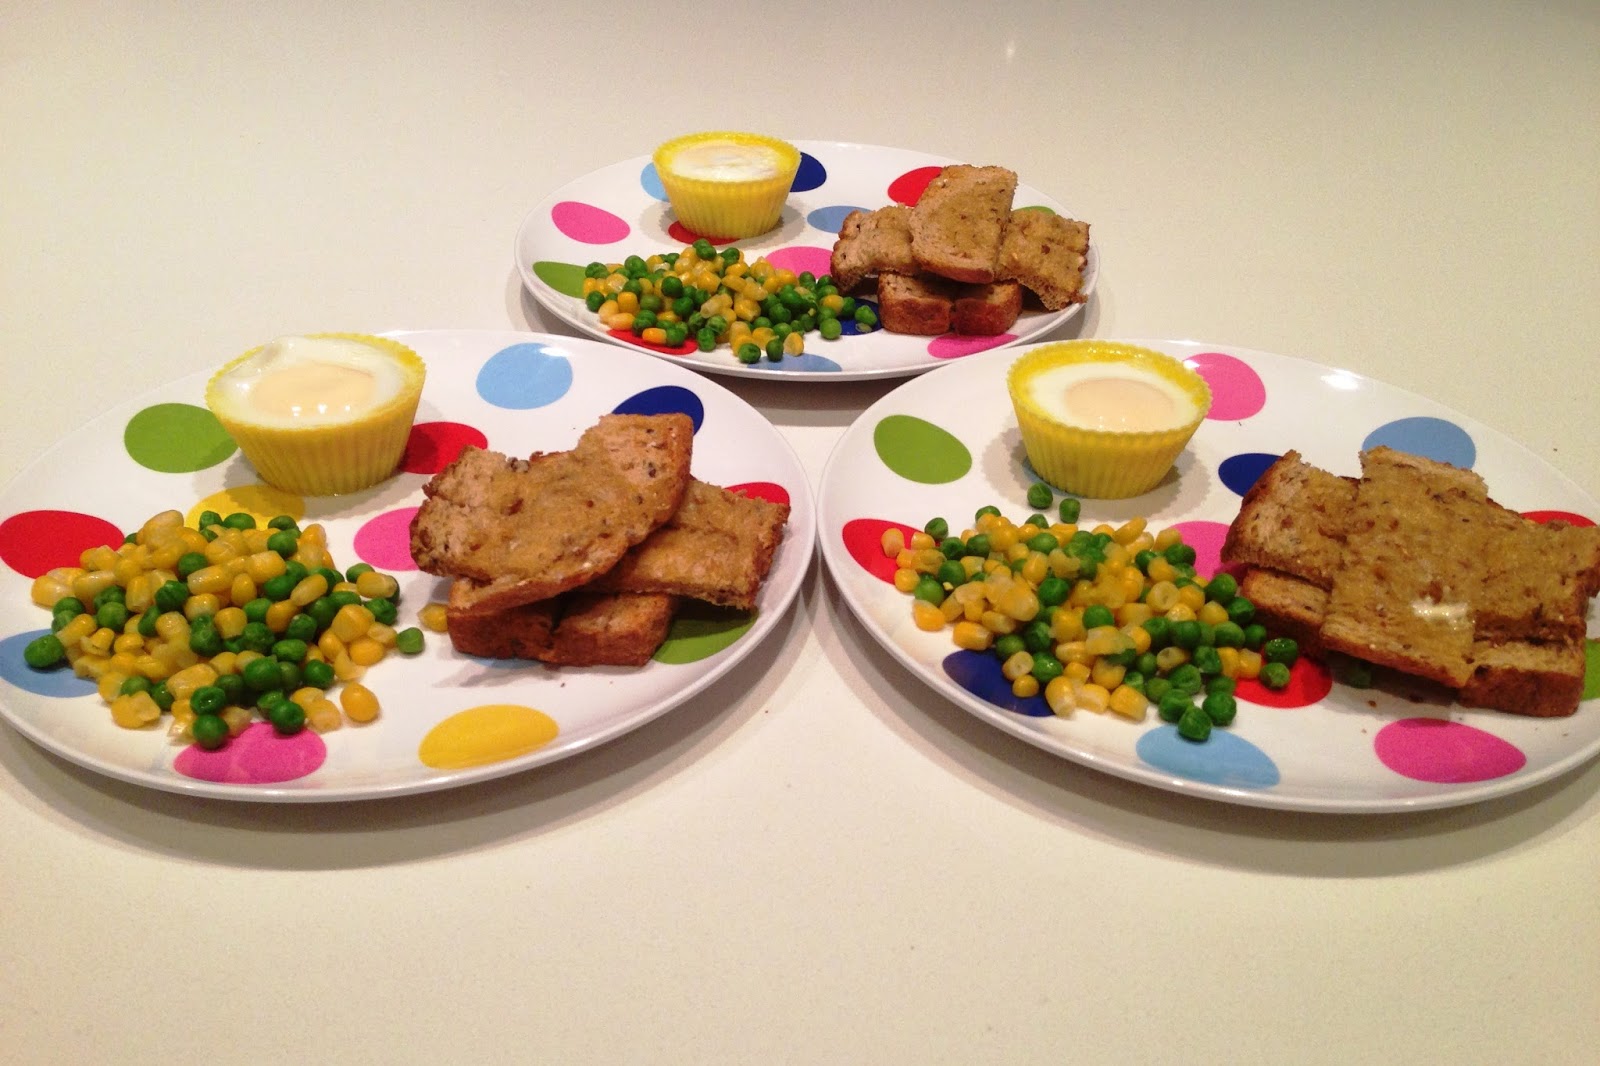
Egg cupcakes with toast soldiers, peas and corn
This recipe is based on Louise Fulton Keats' recipe eggs in ramekins in her new Baby and Toddler cookbook. My ramekins are too large for the varoma, so I had the idea of using my silicon cupcake molds. The boys love "egg cupcakes" at the moment, and it is one of the very rare meals that all three of them will finish completely, the elusive "trifecta"!
The recipe is so simple! Put the desired number of ramekins/silicon molds on the varoma tray, place a small amount of chopped bacon in the bottom of each silicon mold and crack an egg on top. In the varoma dish put the required amount of frozen peas and corn (or other vegetables of your choice). Place 500g of water in the bowl and put the varoma in position. Cook for 15-17 min/varoma/sp7. Serve with toast soldiers :)
Nico's butter chicken with naan bread

The marinating chicken

What can be better than butter chicken and naan bread on a cold winter's night?!
We do eat as a family most evenings, but about once to twice a week we feed the kids a quick and basic meal like the egg cupcakes and treat ourselves to an adult meal that is a little spicier than the kids enjoy, and we enjoy eating without getting indigestion! This week I made Nico's Butter Chicken from the new cookbook by Nico Moretti "Cooking Passions: Delicious Journeys". I used the naan recipe from the Indian cookbook. It was definitely delicious, and not too time consuming. I just planned this meal for a day when I had time to make the marinade during the middle of the day for dinner that evening.
Marinade:
10g ginger, peeled
2 cloves of garlic
40g tandoori paste
60g plain yoghurt
20g lemon/lime juice
60g butter
1.5kg chicken thighs cut in half
Place ginger and garlic into TM bowl and chop 5 sec/sp7.
Scrape down sides of the bowl and add butter and melt 2 min/70C/sp2.
Add tandoori paste, yoghurt and lemon juice and stir to combine 1:30min/sp3.
Butter chicken sauce:
20g oil
1 onion peeled and quartered
2 cloves of garlic
20g/1.5cm ginger peeled
1-2 green chillies (or to taste), roughly chopped
2 coriander root (incl. 5cm stalk), reserve leaves for garnish
1 tsp cardamon powder
60g butter
40g tomato puree/passata
40g toasted blanched almonds
1 cinnamon stick
1 bay leaf
140ml coconut cream
1/2 tsp garam masala
20g tamarind paste
20g palm or brown sugar
2 tsp salt
coriander leaves and chopped chilli for garnish
Toast blanched almonds in oven, then grind 8 sec/sp9.
Place butter, oil, onion, ginger, garlic, coriander roots, chillies and cardamon into TM bowl and chop 10 sec/sp5. Scrape down and repeat to achieve a wet paste.
Add cinnamon stick, bay leaf, ground almonds and pureed tomatoes and cook 8 min/varoma/sp2.
Insert BUTTERFLY, add marinated chicken pieces and cook 15min/100C/REVERSE/sp1, until chicken is cooked through.
Pour into large serving dish, taste for seasoning and garnish with a drizzle of coconut cream, coriander leaves and sliced chillies. Serve with rice and naan bread!
Nico's cookbook Delicious Journeys can be purchased online from his website:
Pizza night!

Pear & Prosciutto

Prawn, brie & sweet chilli

Banana, walnut & maple syrup dessert pizza

Kiwi explosion dessert pizza
We LOVE making pizza dough in the thermie. It works our perfectly every time and a couple of batches can be whipped up in no time. Best of all left over pizza dough freezes really well for use at a later date.
For our savoury pizzas we use passata as our pizza sauce for most things. Philly cream cheese is great to use for prawns and BBQ sauce (made in the thermie of course) is awesome on a meat lovers style pizza.
Some of our fave topping combos include prosciutto and sliced pear (the riper the better), topped with a little brown sugar, yum! Prawns, brie and sweet chilli sauce (I make Cyndi O'Meara's recipe) is another hit.
Dessert pizzas are amazing, and we like to get creative with whatever ingredients we have on hand. We generally use vanilla custard (from the Everyday Cookbook) as our sauce. Topped with banana, walnuts and maple syrup is so delicious. The kiwi with strawberry vanilla jam and dusted with icing sugar was also divine!
And so ends my first menu plan for you. I hope it at least given you some inspiration for the coming week in your kitchen :)
My thoughts on menu planning...
I started menu planning years before I got my Thermomix, basically to ensure I had to make minimal trips to the shops with my children in tow! I recently heard it said that "shopping with kids is like trying to take a maths test while being repeatedly hit over the head", I have to say, I agree!! Hats off to all the mothers out there who can serenely swan around the shops with their well behaved children in tow. My three boys are getting better to shop with, but if I have the choice of doing a weekly grocery shop without any of them I will!
Not only does menu planning save me time, money but also my sanity, as it makes my week run more smoothly when I'm not having to decide in the mayhem of my everyday life what is for dinner that night. I try to sit down on a Sunday night when all my little darlings are tucked up in bed and browse through my recipe books and decide on my weekly menu plan, taking into account how much time I will have for preparation each day and if anyone is planning to be out for dinner. Of course I also try to choose a variety of proteins and vegetables etc and make it as healthy and tasty as possible.
After raving like a loony one night about the starving children in Africa when all my boys declared their dinner was yucky, after I had calmed down I sat the boys down and we made "The List". "The List" was a list of all the dinners they did like to eat. When we wrote it down I was actually surprised at what a good range of meals they actually enjoyed, and that was a good starting point for my menu planning. That was a few years ago and now "The List" has grown a lot longer, as every so often I will tell the boys that I want them to try a new meal to see if it can be put on "The List", and more often than not it is approved by my panel of judges as on it goes! If you have fussy eaters I reckon it is worth starting your own list.
Menu planning is worth the effort and with the help of my thermie I feel that my family are pretty lucky with the variety and quality of the food I serve up to them. The point of my blog is to "share the love" of menu planning and thermomixing!
I am not a nutritionist and my family has no special dietary requirements so my ideas will not suit everybody. I just want to share some inspiration for down to earth weekly menu planning, especially for families with young children.
I am excited to share my first weekly menu plan with you. I will aim to put up a regular menu plan with photos and recipes for 5 weekly meals. I like to be a little more flexible and creative on the weekends when I have time (and can duck to the shops sans kids!)
Friday, 19 July 2013
Spreadable butter
.JPG)
Spreadable butter done!

I like the taste of the Jingilli extra virgin olive oil (made in Gingin WA)
We no longer buy margarine at my place. Instead a far cheaper (about 1/2 the cost) and much more delicious option is to make our own spreadable butter. I use the recipe from the Robogourmet iPad app. Basically after making the butter (as per the Everyday Cookbook method), you simply add 80g of the oil of your choice plus a pinch or two of salt and mix for approx 20 seconds on speed 4. Make sure you use a good quality olive oil, or if you don't like that flavour perhaps something like grapeseed oil which has a neutral flavour.
Making butter
.JPG)
Freshly churned butter & butter milk
.JPG)
Buttermilk and rinsed butter

Taadaa, Thermomix made butter!
I have been making my own butter for a while now. For a start it is cheaper and it only takes about 5 minutes in total to make (as per the recipe in the Everyday Cookbook). I use the WA brand Harvey Fresh whipping cream and usually have two 600ml cartons in my fridge ready to go. The other great thing about making your own butter is collecting the butter milk to use in other recipes.
A good tip for getting your butter to last as long as possible is to rinse it twice with cold water instead of once. This makes sure you get rid of any excess butter milk, which goes off before the butter solids.
We have pancakes most Saturday mornings, so our butter milk generally get used for these. The Everyday cookbook has a recipe for buttermilk bread, and it can be used in a lot of other baking recipes. After I have made the butter I usually don't bother washing the jug and make either a batch of spreadable butter or a cake or some biscuits, yum!
Thursday, 18 July 2013
Healthy ANZAC biscuits
.JPG)

This afternoon I made a batch of ANZAC biscuits using the recipe from the Everyday Cookbook, except I substituted a few ingredients for healthier options, but using the same weight as in the recipe. Instead of butter I used coconut oil, dark agave nectar for brown sugar and rapadura sugar instead of brown sugar. The end result is a delicious and very crunchy biscuit. The whole family LOVES them so this recipe will be a regular in our house!
Subscribe to:
Posts (Atom)